Reading time: 4 min
This recipe shows how to implement views that dynamically change their visibility based on a set of permissions. This allows you to configure your UI based on what the app user should see, in order to accommodate, e.g, a set of user roles or a different kind of access control.
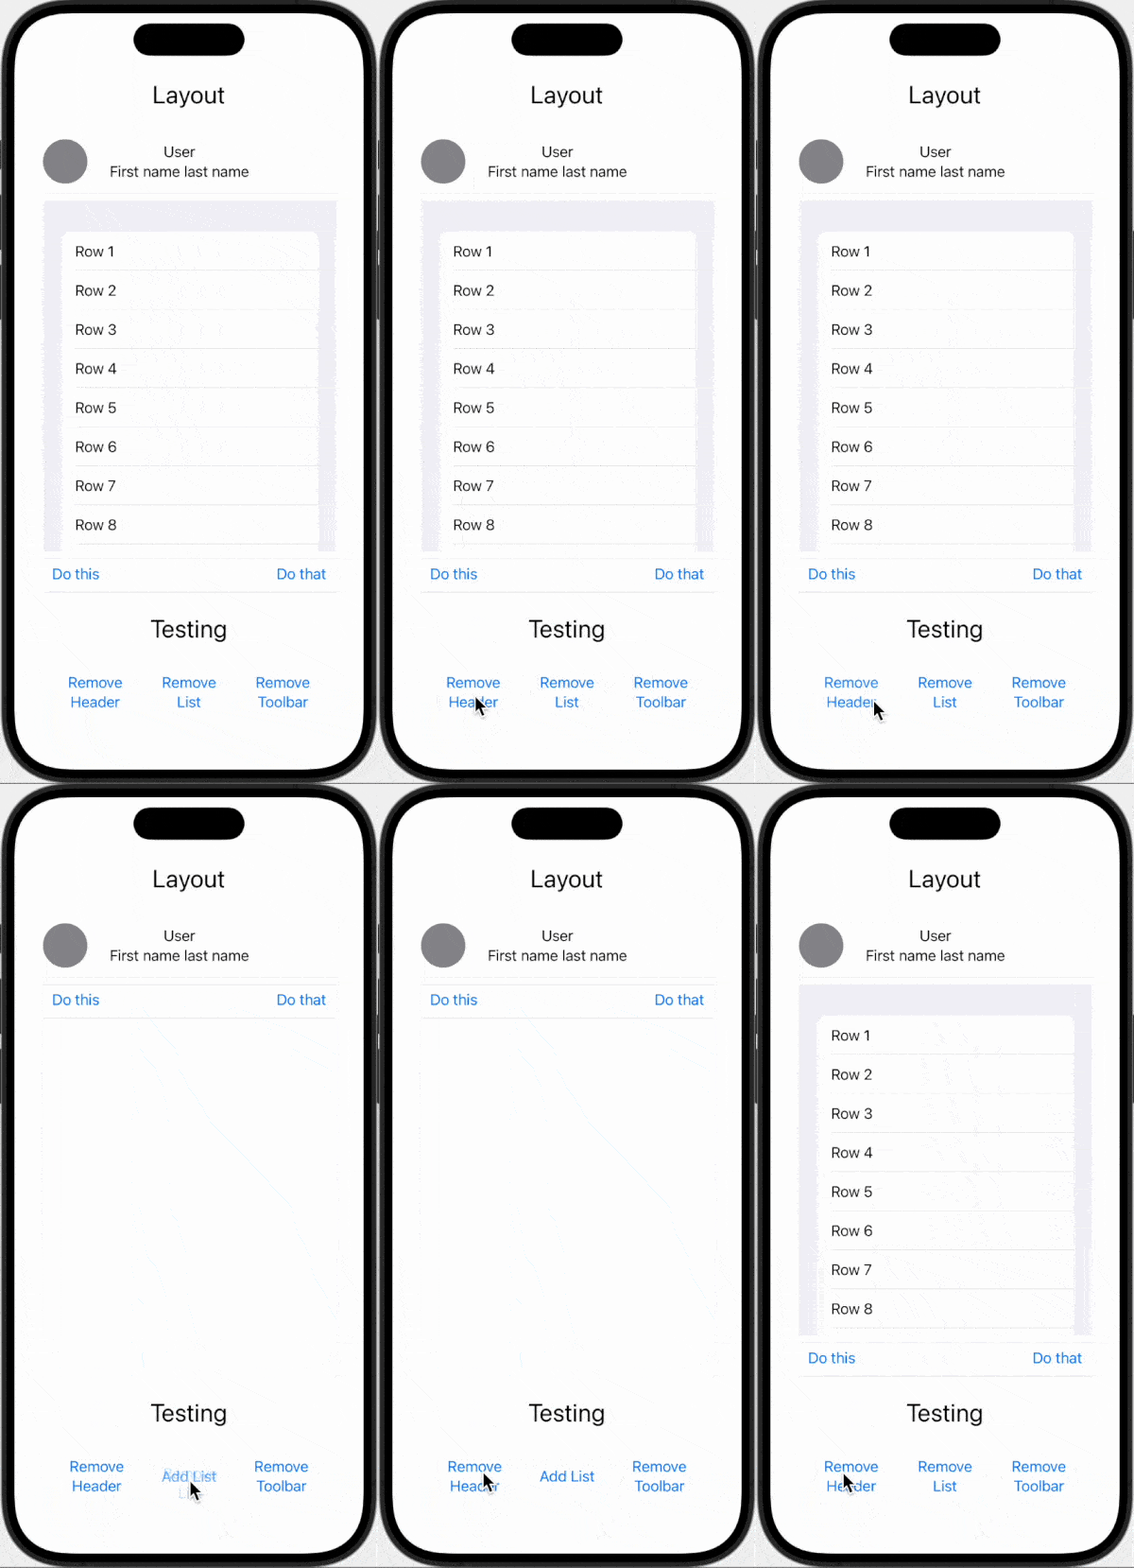
The end result looks like this:

The basics
Consider that your app declares a list of available permissions that its user might have. E.g, some users might not be able to see a list of data on the home screen. Other users who don't have edit permissions wouldn't be able to see a toolbar, etc.
The basic idea is quite simple - we'll allow a View to declare a list of permission it requires in order to render itself. That list of permissions is then resolved by another entity which we'll call PermissionManager, which gets to say if the currently logged in user has the necessary permissions.
Permissions can really be anything. In this case, we'll opt for a simple enum to define permissions and our permissions manager will just have a set of them to check against. In reality, the manager can use whatever is wants to figure out if the user has a permission or not - the list of permissions can come from the back-end, or it can query the database to decide if the user has the required data, or you can plug in iOS permissions into it as well - the possibilities are really endless.
Let's start by defining a simple enum that holds our app permissions:
enum AppPermission: CaseIterable, CustomStringConvertible {
  case header, list, toolbar

  var description: String {
    switch self {
    case .header:
      return "Header"
    case .list:
      return "List"
    case .toolbar:
      return "Toolbar"
    }
  }
}
Then, all that our PermissionManager has to do is figure out if the user has access to a permission:
protocol PermissionManager: Observable, ObservableObject {
  func hasPermission(_ permission: AppPermission) -> Bool
}
We're declaring PermissionsManager as conforming to Observable and ObservableObject so that we can easily inject it into Environment!
And finally, our PermissionView holds the necessary scaffolding to make permission-based decisions on its own visibility:
protocol PermissionView: View {
  associatedtype VisibleBody: View
  associatedtype RealPermissionManager: PermissionManager
  var permissionManager: RealPermissionManager { get}
  var visibleBody: VisibleBody { get }
  var permissions: [AppPermission] { get }
}

extension PermissionView {
  @ViewBuilder var body: some View {
    if permissions.contains(where: permissionManager.hasPermission(_:)) {
      self.visibleBody
    } else {
      EmptyView()
    }
  }
}
Sample implementation
Now let's put this to use and demonstrate how we can dynamically update our UI based on permissions.
First we need a concerte implementation of a PermissionManager, in this case one where permissions are stored in a Set and can be added or removed on the fly:
class PermissionManagerImpl: PermissionManager {
  @Published var allowedPermissions = Set<AppPermission>()

  init(initialPermisions: [AppPermission]) {
    self.allowedPermissions = Set(initialPermisions)
  }

  func hasPermission(_ permission: AppPermission) -> Bool {
    allowedPermissions.contains(permission)
  }

  func addPermission(_ permission: AppPermission) {
    allowedPermissions.insert(permission)
  }

  func removePermission(_ permission: AppPermission) {
    allowedPermissions.remove(permission)
  }
}
Start by defining a sample header view that requires the .header permission to be rendered:
struct HeaderView: PermissionView {
  // we have to use a concrete implementation here, as using
  // : PermissionManager or : any PermissionManager doesn't work
  @EnvironmentObject var permissionManager: PermissionManagerImpl
  // declaratively list required permissions
  let permissions = [AppPermission.header]

  // implement visibleBody instead of Body
  var visibleBody: some View {
    VStack {
      HStack(spacing: 25) {
        Circle()
          .fill(Color.gray)
          .frame(width: 50, height: 50)
        VStack {
          Text("User")
          Text("First name last name")
        }
        Spacer()
      }
      Divider()
    }
  }
}
Now, let's apply the same blueprint for two more views, each using a different permission:
struct ListView: PermissionView {
  @EnvironmentObject var permissionManager: PermissionManagerImpl
  let permissions = [AppPermission.list]

  var visibleBody: some View {
    List(1..<100, id: \.self) {
      Text("Row \($0)")
    }
  }
}

struct ToolbarView: PermissionView {
  @EnvironmentObject var permissionManager: PermissionManagerImpl
  let permissions = [AppPermission.toolbar]

  var visibleBody: some View {
    VStack {
      Divider()
      HStack {
        Button("Do this") {}
        Spacer()
        Button("Do that") {}
      }
      .padding(.horizontal, 10)
      Divider()
    }
  }
}
To make the demo a bit nicer, we'll have the ability to toggle permissions on the fly, so add this little helper view:
struct PermissionToggle: View {
  @EnvironmentObject var permissionManager: PermissionManagerImpl
  let permission: AppPermission

  var body: some View {
    Button("\(permissionManager.hasPermission(permission) ? "Remove" : "Add") \(permission.description)") {
      if permissionManager.hasPermission(permission) {
        permissionManager.removePermission(permission)
      } else {
        permissionManager.addPermission(permission)
      }
    }
  }
}
Finally, here's the full demo, with PermissionManager injected into .environment. You can see how no extra work is needed, and the parent views can be oblivious of if their subviews are permission-dependent or not, with subviews themselves dictating if they'll be rendered based on the current permission config:
struct PermissionViewTest: View {
  @ObservedObject var permissionManager = PermissionManagerImpl(initialPermisions: AppPermission.allCases)

  var body: some View {
    VStack {
      Text("Layout")
        .font(.title)
      VStack {
        HeaderView()
        ListView()
        ToolbarView()
      }
      .padding()
      Spacer()
        Text("Testing")
          .font(.title)
      HStack(spacing: 40) {
        ForEach(AppPermission.allCases, id: \.self) {
          PermissionToggle(permission: $0)
        }
      }
      .padding()
    }
    .padding()
    .environment(permissionManager)
  }
}