Reading time: 6 min
Pull to refresh is a common UI pattern, supported in UIKit via UIRefreshControl. (Un)surprisingly, it's also unavailable in SwiftUI. (EDIT: It's been added in SwiftUI 3 - however, it has many drawbacks compared to this solution.)
This recipe shows how to implement this functionality with any ScrollView. It also doesn't rely on UIViewRepresentable.
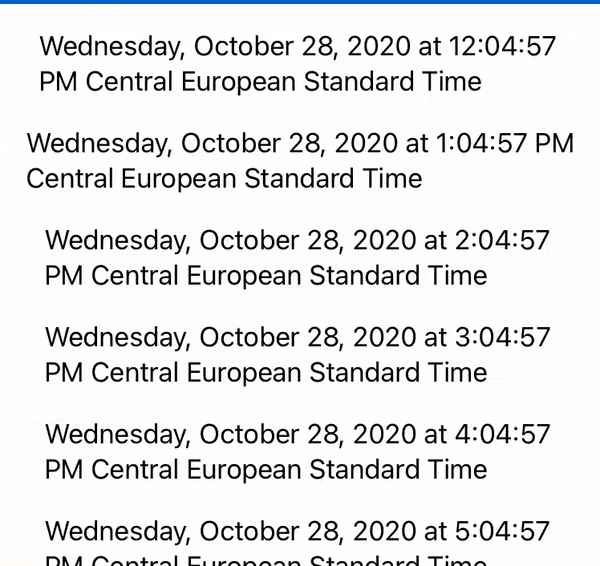
The end result will look like this:
This component is available as a Swift Package in this repo.
Before we get started, here's a quick breakdown of how it'll work:
- You'll embed your desired content in a
ScrollView, just like your normally would - but then you'll add the refresh indicator and two positioning views to track scrolling. - The relative offset between the two positioning views will determine how much you scrolled, and consequently if you triggered a refresh.
- You'll use View Preferences to track the scrolling offset and change the refreshing state.
- Once you pull down enough, the View will enter the primed state, and will wait for the pull to end and go back up.
- When the pull ends, the View will enter the loading state and trigger the provided refresh block.
- The refresh block will trigger a callback to let the View know that it's done refreshing.
Let's get started! Create a new SwiftUI file named RefreshableScrollView.swift. Start off by doing the View Preferences groundwork:
// There are two type of positioning views - one that scrolls with the content,
// and one that stays fixed
private enum PositionType {
  case fixed, moving
}

// This struct is the currency of the Preferences, and has a type
// (fixed or moving) and the actual Y-axis value.
// It's Equatable because Swift requires it to be.
private struct Position: Equatable {
  let type: PositionType
  let y: CGFloat
}

// This might seem weird, but it's necessary due to the funny nature of
// how Preferences work. We can't just store the last position and merge
// it with the next one - instead we have a queue of all the latest positions.
private struct PositionPreferenceKey: PreferenceKey {
  typealias Value = [Position]

  static var defaultValue = [Position]()

  static func reduce(value: inout [Position], nextValue: () -> [Position]) {
    value.append(contentsOf: nextValue())
  }
}
OK, Preferences are ready, so add this custom View that emits its current Y position to the preferences. Of course, it relies on a GeometryReader to obtain its frame:
private struct PositionIndicator: View {
  let type: PositionType

  var body: some View {
    GeometryReader { proxy in
        // the View itself is an invisible Shape that fills as much as possible
        Color.clear
          // Compute the top Y position and emit it to the Preferences queue
          .preference(key: PositionPreferenceKey.self, value: [Position(type: type, y: proxy.frame(in: .global).minY)])
     }
  }
}
Now let's lay some groundwork for the actual RefreshableScrollView:
// Callback that'll trigger once refreshing is done
typealias RefreshComplete = () -> Void
// The actual refresh action that's called once refreshing starts. It has the
// RefreshComplete callback to let the refresh action let the View know
// once it's done refreshing.
typealias OnRefresh = (@escaping RefreshComplete) -> Void

// The offset threshold. 50 is a good number, but you can play
// with it to your liking.
private let THRESHOLD: CGFloat = 50

// Tracks the state of the RefreshableScrollView - it's either:
// 1. waiting for a scroll to happen
// 2. has been primed by pulling down beyond THRESHOLD
// 3. is doing the refreshing.
private enum RefreshState {
  case waiting, primed, loading
}
And now for the big one:
struct RefreshableScrollView<Content: View>: View {
  let onRefresh: OnRefresh // the refreshing action
  let content: Content // the ScrollView content

  @State private var state = RefreshState.waiting // the current state

  // We use a custom constructor to allow for usage of a @ViewBuilder for the content
  init(onRefresh: @escaping OnRefresh, @ViewBuilder content: () -> Content) {
    self.onRefresh = onRefresh
    self.content = content()
  }

  var body: some View {
    // The root view is a regular ScrollView
    ScrollView {
      // The ZStack allows us to position the PositionIndicator,
      // the content and the loading view, all on top of each other.
      ZStack(alignment: .top) {
        // The moving positioning indicator, that sits at the top
        // of the ScrollView and scrolls down with the content
        PositionIndicator(type: .moving)
          .frame(height: 0)

         // Your ScrollView content. If we're loading, we want
         // to keep it below the loading view, hence the alignmentGuide.
         content
           .alignmentGuide(.top, computeValue: { _ in
             (state == .loading) ? -THRESHOLD : 0
            })

          // The loading view. It's offset to the top of the content unless we're loading.
          ZStack {
            Rectangle()
              .foregroundColor(.white)
              .frame(height: THRESHOLD)
            ActivityIndicator(isAnimating: state == .loading) {
              $0.hidesWhenStopped = false
            }
          }.offset(y: (state == .loading) ? 0 : -THRESHOLD)
        }
      }
      // Put a fixed PositionIndicator in the background so that we have
      // a reference point to compute the scroll offset.
      .background(PositionIndicator(type: .fixed))
      // Once the scrolling offset changes, we want to see if there should
      // be a state change.
      .onPreferenceChange(PositionPreferenceKey.self) { values in
        if state != .loading { // If we're already loading, ignore everything
          // Map the preference change action to the UI thread
          DispatchQueue.main.async {
            // Compute the offset between the moving and fixed PositionIndicators
            let movingY = values.first { $0.type == .moving }?.y ?? 0
            let fixedY = values.first { $0.type == .fixed }?.y ?? 0
            let offset = movingY - fixedY

            // If the user pulled down below the threshold, prime the view
            if offset > THRESHOLD && state == .waiting {
              state = .primed

            // If the view is primed and we've crossed the threshold again on the
            // way back, trigger the refresh
            } else if offset < THRESHOLD && state == .primed {
              state = .loading
              onRefresh { // trigger the refreshing callback
                // once refreshing is done, smoothly move the loading view
                // back to the offset position
                withAnimation {
                  self.state = .waiting
                }
              }
            }
          }
        }
      }
  }
}
The ActivityIndicator is based on the following wrapped UIActivityIndicatorView. Of course, you're free to use any other View to indicate refreshing (like a normal circular ProgressView if you don't have to support SwiftUI 1):
struct ActivityIndicator: UIViewRepresentable {
  public typealias UIView = UIActivityIndicatorView
  public var isAnimating: Bool = true
  public var configuration = { (indicator: UIView) in }

  public init(isAnimating: Bool, configuration: ((UIView) -> Void)? = nil) {
    self.isAnimating = isAnimating
    if let configuration = configuration {
      self.configuration = configuration
    }
  }

  public func makeUIView(context: UIViewRepresentableContext<Self>) -> UIView {
    UIView()
  }

  public func updateUIView(_ uiView: UIView, context: UIViewRepresentableContext<Self>) {
    isAnimating ? uiView.startAnimating() : uiView.stopAnimating()
    configuration(uiView)
  }
}
Lastly, test what you've just done. Here's a small scrollable list that mockly refreshes for 3 seconds, after which it updates the start date:
struct TestView: View {
  @State private var now = Date()

  var body: some View {
     RefreshableScrollView(onRefresh: { done in
        DispatchQueue.main.asyncAfter(deadline: .now() + 3) {
          self.now = Date()
          done()
        }
      }) {
        VStack {
          ForEach(1..<20) {
            Text("\(Calendar.current.date(byAdding: .hour, value: $0, to: now)!)")
               .padding(.bottom, 10)
           }
         }.padding()
       }
     }
   }
}
SwiftUI 3 solution
Apple finally decided to tackle this in SwiftUI 3 (iOS 15, macOS 12) via the refreshable modifier:
@State private var now = Date()

var body: some View {
  List(1..<20) {
    Text("\(Calendar.current.date(byAdding: .hour, value: $0, to: now)!)")
      .padding(.bottom, 10)
  }
  .refreshable { // HERE
    await Task.sleep(3_000_000_000)
    now = Date()
  }
}
However, this solution has several drawbacks compared to the custom approach from this recipe:
- It can only be added to
Lists. The solution here works with anything wrapped in aScrollView. - You can't customize the activity indicator / spinner that's shown when you pull to refresh.
- You can't control when does the refresh go away. Granted, that's not that big of an issue, as most of the time you want it to go away after the
asyncoperation is finished.