Side menu in SwiftUI (updated 05/21)
Reading time: 4 min
This tutorial shows how to create a side menu (or navigation drawer, as it's known on Android), in SwiftUI. It's also a good showcase of using GeometryReader to offset views and DragGesture to detect user gestures.
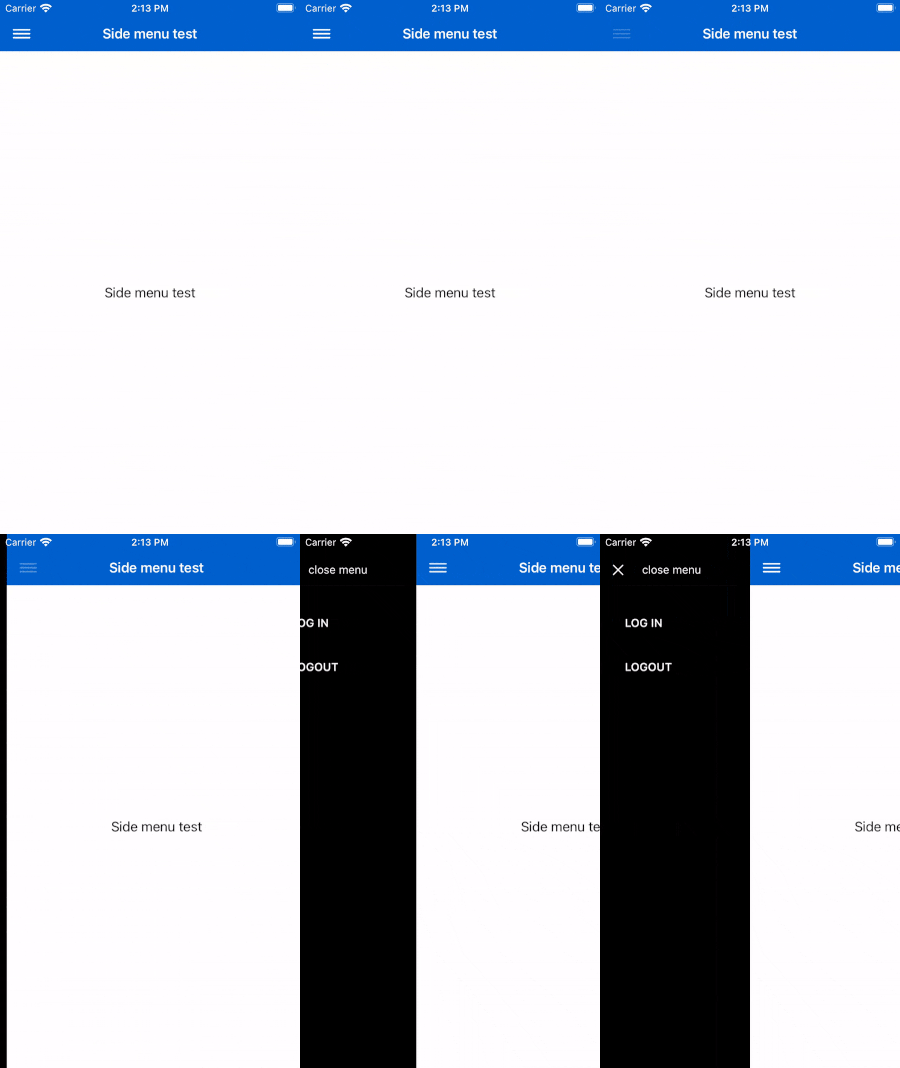
The end result will look like this:

This component is available as a Swift Package in this repo.
Start off by creating a simple struct to model a side menu item. It's important for it to be Hashable so that it may be used in ForEach in the side menu view itself:
struct SideMenuItem: Hashable {
  let title: String
  let action: () -> Void // Triggers when the item is tapped

  static func == (lhs: SideMenuItem, rhs: SideMenuItem) -> Bool {
    lhs.title == rhs.title && lhs.imageName == rhs.imageName
  }

  func hash(into hasher: inout Hasher) {
    hasher.combine(title)
    hasher.combine(imageName)
  }
}
Next, add the side menu View. It has a button at the top to manually close itself, and renders the items in a list.
struct SideMenuView: View {
  @Binding var show: Bool
  @Binding var items: [SideMenuItem]

  var body: some View {
    VStack(alignment: .leading) {
      Button(action: {
        withAnimation {
          self.show = false
        }
      }) {
        HStack {
          Image(systemName: "xmark")
            .foregroundColor(.white)
          Text("close menu")
            .foregroundColor(.white)
            .font(.system(size: 14))
            .padding(.leading, 15.0)
        }
      }.padding(.top, 20)
      Divider().foregroundColor(.white)
      ForEach(self.items, id: \.self) { item in
        Button(action: item.action) {
           Text(item.title.uppercased())
             .foregroundColor(.white)
             .font(.system(size: 14))
             .fontWeight(.semibold)
         }.padding(.top, 30)
       }
       Spacer()
     }.padding()
     .frame(maxWidth: .infinity, alignment: .leading)
     .background(Color.black)
     .edgesIgnoringSafeArea(.all)
  }
}
Lastly, it's time to put the view to use. It allows you to open the side menu in one of two ways:
- Pressing the
NavigationViewbutton on the left-hand side. (With theNavigationViewitself styled as described in this tutorial.) - A drag gesture that:
- Starts at most 200 pixels off left edge of the screen,
- Is fairly horizontal,
- Spans at least 50 pixels.
struct MyView: View {
  @State private var showSideMenu = false
  private let sideMenuItems = [
    SideMenuItem(title: "Log in") {
      // TODO
    }),
    SideMenuItem(title: "Logout") {
      // TODO
    }
  ]

  var body: some View {
    let drag = DragGesture().onEnded { event in
      // starts at left-hand side and is horizontal with a min length
      if event.location.x < 200 && abs(event.translation.height) < 50 && abs(event.translation.width) > 50 {
        withAnimation {
          // Open if the drag was left-to-right, close if it was right-to-left
          self.showSideMenu = event.translation.width > 0
        }
      }
    }

    return GeometryReader { geometry in
      ZStack(alignment: .leading) {
        NavigationView {
          mainView
            .disabled(self.showSideMenu) // disable any interaction with the main view while the side menu is open
            .navigationBarTitle("Side menu test", displayMode: .inline)
            .navigationBarItems(leading: (
              Button(action: { // the button to open/close the menu
                withAnimation {
                  self.showSideMenu.toggle()
                 }
               }) {
                 Image(systemName: "line.horizontal.3")
                   .imageScale(.large)
               }
             )).blueNavigation
        }.frame(width: geometry.size.width, height: geometry.size.height)
        .offset(x: self.showSideMenu ? geometry.size.width / 2 : 0) // If the side menu is open, offset other views half way across the screen

        if self.showSideMenu {
          SideMenuView(show: self.$showSideMenu, items: self.sideMenuItems)
            .frame(width: geometry.size.width / 2) // The side menu spans half the screen
            .transition(.move(edge: .leading))
        }
      }.gesture(drag)
    }
  }

  private var mainView: some View { // This is your content
      VStack {
        Text("Side menu test")
      }
  }
}
Side menu as a ViewModifier
The code above can easily be adapter into a ViewModifier to allow it to be attached to any view. This is the idea behind the SideMenu Swift Package.
Below is the code. You can see that it abstracts the menu content into a separate @ViewBuilder, and just leaves the frame that deals with swipe gestures, animations and offsets between the side menu and the main view:
struct SideMenu<MenuContent: View>: ViewModifier {
  @Binding var isShowing: Bool
  private let menuContent: () -> MenuContent

  public init(isShowing: Binding<Bool>,
       @ViewBuilder menuContent: @escaping () -> MenuContent) {
    _isShowing = isShowing
    self.menuContent = menuContent
  }

  func body(content: Content) -> some View {
    let drag = DragGesture().onEnded { event in
      if event.location.x < 200 && abs(event.translation.height) < 50 && abs(event.translation.width) > 50 {
        withAnimation {
          self.isShowing = event.translation.width > 0
        }
      }
    }
    return GeometryReader { geometry in
      ZStack(alignment: .leading) {
        content
          .disabled(isShowing)
          .frame(width: geometry.size.width, height: geometry.size.height)
          .offset(x: self.isShowing ? geometry.size.width / 2 : 0)

          menuContent()
            .frame(width: geometry.size.width / 2)
            .transition(.move(edge: .leading))
            .offset(x: self.isShowing ? 0 : -geometry.size.width / 2)
      }.gesture(drag)
    }
  }
}

extension View {
  func sideMenu<MenuContent: View>(
      isShowing: Binding<Bool>,
      @ViewBuilder menuContent: @escaping () -> MenuContent
  ) -> some View {
    self.modifier(SideMenu(isShowing: isShowing, menuContent: menuContent))
  }
}
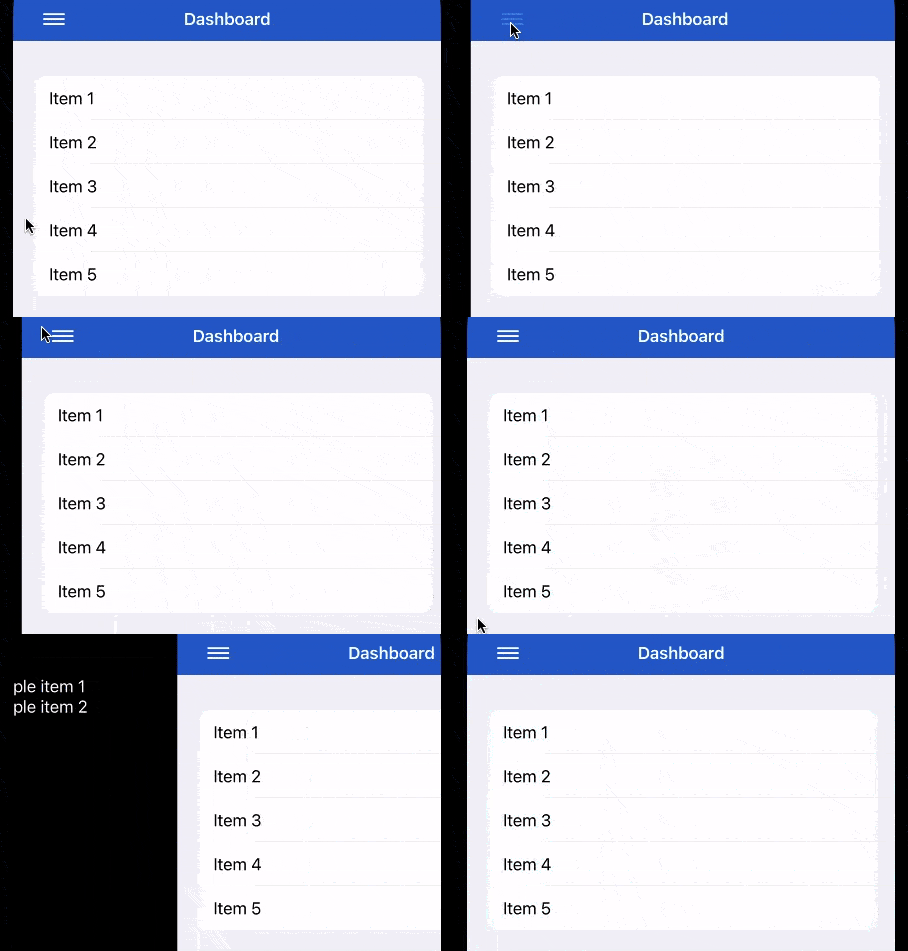
Then, you can use it like this:
struct SideMenuTest: View {
  @State private var showSideMenu = false

  var body: some View {
    NavigationView {
       List(1..<6) { index in
         Text("Item \(index)")
       }.blueNavigation
         .navigationBarTitle("Dashboard", displayMode: .inline)
         .navigationBarItems(leading: (
           Button(action: {
             withAnimation {
               self.showSideMenu.toggle()
             }
           }) {
             Image(systemName: "line.horizontal.3")
               .imageScale(.large)
           }
         ))
      }.sideMenu(isShowing: $showSideMenu) {
        VStack(alignment: .leading) {
          Button(action: {
            withAnimation {
              self.showSideMenu = false
            }
          }) {
            HStack {
              Image(systemName: "xmark")
                .foregroundColor(.white)
              Text("close menu")
                .foregroundColor(.white)
                .font(.system(size: 14))
                .padding(.leading, 15.0)
            }
          }.padding(.top, 20)
            Divider()
              .frame(height: 20)
            Text("Sample item 1")
              .foregroundColor(.white)
             Text("Sample item 2")
               .foregroundColor(.white)
             Spacer()
           }.padding()
             .frame(maxWidth: .infinity, alignment: .leading)
             .background(Color.black)
             .edgesIgnoringSafeArea(.all)
      }
  }
}
and it'll look like this:
