SwiftUI Image Tint
Reading time: 1 min
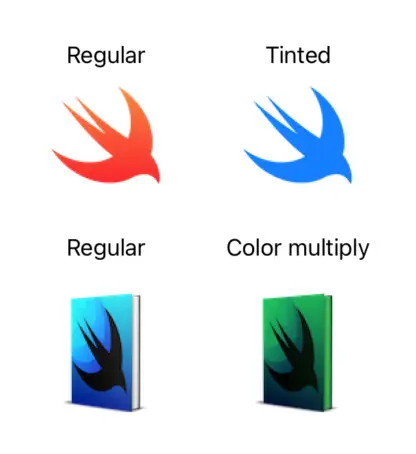
This recipe shows how to tint SwiftUI images in two ways - by setting the template tint or color multiply.
The end result looks like this:

Let's start by saying that foregroundColor has no effect here. With that out of the way, the recipe depends on what you want to do with the image, since I've seen tint being used in more than once context:
For photos and logos with multi-color images, use colorMultiply
Half of the time, "tinting an image" means the following:

This is achieved by using the colorMultiply modifier on the Image:
Image("logo_small")
  .colorMultiply(.green)
For monochrome images, use renderingMode
If you have a monochrome image or one where all that matters is the outline, use renderingMode with template, then apply foregroundColor. This will basically set the color to all non-transparent pixels in the image:
Image("swift")
  .renderingMode(.template)
  .foregroundColor(.blue)
With the following effect:

Using colorMultiply with monochrome images usually leads to undesired results, like the entire image being black.